Thursday, September 6, 2012

Where did Summer GO? Part 1

So I can't believe how this summer has FLOWN by! It makes me a little sad even, to see the last post I had was in July. I have read/ listened to tons of books, at least six I can think of off the top of my head, and I might even review a few on here. This post won't be about books though, and it won't be about crafting, though I suspect I'll be doing more in the coming months. I have ambitious plans for this Christmas, but more on that later!

July was crazy, but August, that is the one that flew by. What I think I'll do in this post is just share some of the pictures from my summertime adventures.

July was full of, (miserable) Jogging, Hiking and Biking... Although I didn't do any of the biking. I'll start first with the biking... My step-father did the Seattle to Portland Bike Ride and my mother and I were the "support staff" for him. (I was there to take pictures and just generally be impressed.)

This, in itself may or may not sound impressive except that the bike ride is 204 miles (328.3 km). Crazy.

My step-father did this in ONE day. Crazier.

My step-father is 70 years-old. Has had two knee replacements and a stint put in. Ridiculousness.

They wrote an article about him in our local newspaper. Complete silliness. (but also kinda cool.)

I will share some of those pictures, plus some my mom doesn't like. I don't care because she posts pictures on Facebook of me every now and then, where I look absolutely terrible and this is my payback. :) (I Love you mom!)

I don't know ANY of these people, but I have MUCH respect for them.
It was quite HOT out when they were riding.
View from the road. I think this is in Kelso...
This is the finish line. Hollowday Park in Portland, OR. When people arrive they
immediate find a place to discard their bike then locate the nearest Beer Garden.
My step-father, Corky, pointing out his next destination, the Beer Garden.
Mom and I on the Support Staff for Corky. We got t-shirts. We really did nothing
but follow him and shop our way south but we had fun, and we took video of him
when he crossed  the finish line.
 And then there was the Hiking...  I've been personally making an effort to lose some weight and I'm have some success. Partly because I am driven see fewer crappy pictures of myself showing up on Facebook (thanks to others who clearly hate me), but mostly because of my two motivators, Jenny and Candi.

These two young women have been at it maybe only a couple months longer than I, but they are doing fantastic! I can't even explain how well they are doing, but I know the pictures you are about to see are a month old now. A month is a LONG time in terms of the amount of weight lost between the three of us. I'm not going to talk about numbers, but I want you to know, these girls are my inspiration, and these pictures don't do anyone any justice. With that said, here are a few that I'm willing to share.

First there was the Gifford Pinchot National Forest Hike near White Pass in Washington State:

Caityn, our Mascot, couldn't seem to get this photo-op together...
I love this view because it's so lovely AND it has
Caityn, my cousin's yellow lab swimming out to
a stick in the middle.
Me, trying not to mess up the picture too much. This is Lake
Packwood or maybe it's Packwood Lake. Either way...
The view from the trail! It's Mt. Rainier!
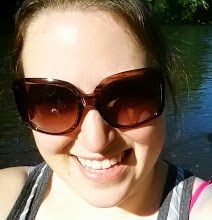
I'm clearly not tired yet... this should be the beginning
photo. I don't even look sweaty yet in this shot!

And then there was Pete's Creek trail in Olympic National Forest... This one was a beast, and we didn't complete it. Photos never do the wilderness ANY justice. I am so impressed by the beauty of this area.

Colonel Bob - Pete's Creek trail side. Steep but shorter than the
Northern side.
This is the GOOD part of this trail.
This is part of the NOT SO GOOD part.
Rain forest trees are huge.
We stopped when we reached the wildflowers. Apparently about
half way to the top. I hear the view is spectacular though.

I am already planning my next hiking weekend. One last hurrah before the end of the summer. We have such short summers here in the Pacific Northwest. This year might be a little longer.

August, what a whirlwind month! So much happened that I think it's worth a whole separate post.

Tuesday, July 3, 2012

2 Minute Book Review: The Thirteenth Tale


Reading time for this post: 1 minute, 59 seconds. Read it Later


Book: The Thirteenth Tale

Author: Diane Setterfield

Audiobook read by: Bianca Amato and Jill Tanner

This book is for those who loved reading the classics. This is the story of Vida Winter, an aging reclusive, but quite famous author, who requests a young biographer, Margaret Lea, to write her story. With her strange and secretive past, the ailing Winter weaves a strange and extraordinary tale of her lineage, conjuring tragedy, ghosts, beauty and devastation. Winter is running out of time but she may or may not be ready to tell the whole truth. This Thirteenth Tale is a strange tale indeed.

What I did like:
The writing style is wonderful and I found that my own writing improved during the period I had been reading. I love books that affect me in this way, and they are rare. I personally loved how descriptive the author was, choosing words that were refreshing to the ear. This story is quite a winding tale that remained a mystery up until the very end. Twists and turns abound, I did find myself having to listen more carefully to the narrator so as not to miss any cues or hints. It’s a pleasant surprise when the author doesn’t throw everything out or give it all away in the beginning of the book. There are many layers to this book, and many of my top favorite books are similar in this way. The characters are richly developed and believable.

What I didn't like:
The writing style may be difficult for some, and the biggest complaint I have heard is that because of this, the book feels slow at times. I honestly don’t have any complaints about the Thirteenth Tale. As a side note, I listened to the Unabridged Audiobook, if you might discover you don’t like stories written in the 19th century gothic style but still want to give this story a try, maybe get the Abridged version.

Verdict:
I re-read this book I loved it so much. This review was written after the second reading, and I had at least 3 years since the first go round. This is a book I would gift to my friends or family although it’s an adult story so probably not appropriate for the younger family members. I say adult only because of the mature theme and some pretty serious innuendoes that refer to terrible events. It may sound odd, but the manner on which the book was written, I hardly noticed most of the truly atrocious parts. This would be a good book to analyze with a club or group.


Tuesday, June 19, 2012

Country Style Baby Shower


First and foremost, this was a team effort!

No way it would have turned out so cool without my Aunt Kathie, her daughter Jennifer and our buddy Candi! Candi, Kathie and Jenny worked on all the beautiful (and fabulously tasty) treats, while I just ate them shamelessly. (Hey, I worked out that morning running up and down the stairs about a bazillion times!)

Baby Wyatt is destined to be a cowboy, so that's what our theme was - well that and blue antique Ball jars. Between Jenny and I, I think we had about 12! Not to mention the 25 or so we made into door prizes and shower favors.  Check out the super cute, handmade invites here.


My contribution was mainly the games and prizes, while Jenny and I teamed up on most of the decor. Tissue paper pom-poms from Martha Stewart, burlap runners, raffia, jute, clothes pins, barn wood frame, simple white flower arrangements and a tree were all part of the show.

Thankfully my Aunt had a bunch of flowers and a TREE (random I know) from he older daughter's wedding a couple of weeks earlier.... Seriously a life saver. The tree had a bunch of cute baby items for momma to take with like travel sized baby ointment, socks, binkies and a hanging picture frame even.

DIY - Door prize Ball jar soap dispensers.
Aren't they cute?

Our door prizes were soap pumps made from Ball jars and Bath & Body works soaps. We also had party favors that were Cowboy Cookies in quart sized Ball jars... It had crossed my mind to make one of the games be "How many Ball jars did we use?" but as it was, we had more games than prizes! Jenny found the Cookie recipe on Pinterest. Jenny and Candi put them together in a mad dash a day or so before... I hear it was quite the mess considering they didn't have a funnel to use. HA! I wish I'd have seen it but they turned out SUPER CUTE!


Build-a-Baby Winner and Momma of the hour!
Game list included:
  • Diaper Raffle
  • Match the Animal Momma with the Baby (printable)
  • Guess How Many Clothes Pins Are in the Jar
  • Guess the Gerber's
  • Build a Baby - from Playdoh (and momma chooses winner)

Plus my all time favorite because it's so helpful...
  • Thank You Card Give-Away (People address the Thank You card envelopes to themselves and a winner is drawn from the envelopes.)
** Most of the rules to these games are either self explanatory or available by searching online so I won't go into more detail but everyone seemed to have fun. Awesome Games Available here.

The food was amazing, especially the gluten-free lemon butter cream frosted (and raspberry cream filled) cupcakes. Homemade by Candi!

I made the little flags for the cupcakes and I love how they look on the pedestal with the turquoise ribbon.

I could go on and on about the food but instead I'll just share the pictures and the decor with you now. If you see something you like, let me know in the comments, and if you have questions about how something was made or done, send me a message and I will do my best to explain. Otherwise the rest is a fully gratuitous post for the the baby shower.


Thanks for reading!


Party Favors - Cowboy Cookies in Ball Jars

It's a Cowboy!

Salted Carmel drizzle... oh yeah!

The spread also included 7-layer dip and Raspberry Chipotle dip among other yummies!

All in the details - that is burlap as the table runner.

Cowboy Cookies Galore!

Making a sheriff's badge for her Playdoh baby.
This was hosted at the Polson Museum - I'd use them again in a heartbeat!
Drink Bar with Real Lemonade.

Wooden letters Momma gets to take home and decorate with in the nursery!


Saturday, June 9, 2012

2 Minute Book Review: Girl With the Dragon Tattoo


Reading time for this post: 1 minute, 55 seconds. Read it Later


Book: The Girl with the Dragon Tattoo

Author: Stieg Larsson

Audiobook read by: Simon Vance

This book was recommended to me by a couple people, and surprisingly, one of those was my father. I had wanted to read the book before the movie came out and then watch the movie in the theater. I missed my chance, but I refused to see the film before reading the book. As a disclaimer, I should say that the story is dark, shocking and disturbingly ugly and violent scenes. It's about murder, intrigue, revenge, love and vindication. This was not just a pager turner but I found myself looking

What I didn't like:
The book was a slow starter but since it is part of a trilogy, I can understand the necessity to take the time to lay out more than one storyline. Part of the difficulty in starting the book is that all the names, places, heck; even the currency is foreign as the book is set in Sweden. Thankfully, I listened to the audiobook so it was a little easier to follow. Once you familiarize yourself with the setting, the story moves quickly.

What I did like:
This was definitely a book I couldn't predict, which is somewhat refreshing. Sometimes I need to take a break from the predictable YA love story books I have a tendency to find myself reading. This is a "grown-up" book, and I was enthralled with the mystery and the characters. There were a few plot threads but nothing like the writing of Ken Follett. I find the female lead character, Lisbeth Salander to be an interesting character study. I imagine I'll find my answers in the subsequent books, but I feel like there is so much more to learn about her. I want to know what secrets she is keeping and why. She's a genius, socially awkward, untrusting, damaged, vulnerable and merciless.

Verdict:
I'd recommend this book most certainly, but with a disclaimer for those who aren't comfortable reading about the realities of a serial killer and could never watch Law and Order, SVU. I won't go into much detail here, but let's just say this is a grown-ups only book. (My niece reads these occasionally!) I like this one so much, the same day I finished the first book I reserved the third book and downloaded the second to my ipod from the library!

Wednesday, May 30, 2012

Country Themed Baby Shower Invites


With the help of a Crafty Cousin, and a Zazzle inspired design, we made just about the cutest baby shower invitations you've probably ever seen. Handmade to imperfection.

This one won't be a How-To, just more of a proud boasting of our accomplishments, LOL!


I just hope they arrive in the mailboxes in the same shape that they were sent. The little bit of wheat is a little bulky, and I know the mail processing machines are angry, hungry beasts that make their meals from practically anything. I've had totally flat cards come to me mangled and torn.

This was my first foray into distressing, and I'd like to thank TwoPeasInABucket and their video on  YouTube for making it less intimidating. My favorite details are the two brads holding the top invite badge in place. This means less sticky dots were used, since literally EVERYTHING else on here was glued down using them. I'm a big fan of the burlap ribbon my cousin picked out. It adds a nice texture to the whole invite.

All in all, I think we can now go into business.

JUST KIDDING! These were a labor of love but they really only took about 4 hours to make about 20, from start to finish. That included the deliberation time we needed to figure out our layout and addressing envelopes.

Let me know what you think, and feel free to ask me questions.

Saturday, May 12, 2012

2 Minute Book Review: Delirium

Reading time for this post: 2 minute, 26 seconds. Read it Later


Book: Delirium
Author: Lauren Oliver
Audio book read by: Sarah Drew (Grey's Anatomy anyone?)

After reading the book "Before I Fall" by the same author, I decided I wanted to read more from her. The story is well written, and really like Sarah Drew's voice for the main character, Lena. The premise of the book was a bit of a stretch for me because I find it difficult to believe the human race could be convinced (by their government no less) that it's safer to have a lobotomy rather than to risk feeling love. The word love has itself been vetoed and now is known as "amor deliria nervosa." Much like the main character in Before I Fall, Lena seems too scared to do anything out of her highly pressured comfort zone. In Lena's case, the government enforces the societal rules, and in Samantha's case, her friends do. Both are not living their true natures, both conform to their societies. In Lena's story though, she didn't know she there was another option. Once she learned about the truth, she rejected the idea that love is dangerous.

What I didn't like:
It takes Lena a long time to break away from her obedient, brainwashed persona. She was very indecisive for most of the book, and I found her best friend to be a more interesting characters at times. It was a little slow, and from what I can tell, by the end of the book she's still not the ballsiest heroin that I've read. However, I do feel like there is potential for serious growth. The book had the feel of a very long set-up for the real story to begin in the second installment.

What I did like: 
The writing is almost like lyrics and prose. In a way, although Lena was not the typical brave heroin, I did find her believable, just not relatable. I’m a sucker for love stories, even if this one was a little bit of a stretch. True love in teenagers is a tough one for me to swallow no matter who’s book I’m reading. And maybe that is the point. Maybe viewing this story through the eyes of a near 30-year-old adult, makes it easier to see into the future of this love story. Teen romances rarely last, and this is only the first book of three, so maybe the flaws in the love story are intentional.

Verdict:
I'd recommend this book. It's an interesting story, and dystopian books are really popular at the moment. I am really anticipating the second and third installments of this book, despite originally choosing the book because I thought it was not a part of a series. I want to know more about the rest of the world Lena lives in and I expect that the subsequent books will fill in the picture a little more for me. I can’t wait for the next book, as the buildup in this one was just getting heated at the very end.

Wednesday, May 9, 2012

2 Minute Book Review: Before I Fall

Reading time for this post: 1 minute, 52 seconds. Read it Later


Book: Before I Fall
Author: Lauren Oliver
Audio book read by: Sarah Drew (Grey's Anatomy anyone?)

This book was the teen equivalent of the movie Groundhog Day (with Bill Murray). I was immediately drawn to the premise of having one day repeated until you finally "got it right." (Plus, I love the movie Groundhog Day.) Even though it was not an original idea, the story of Before I Fall was. It was an interesting concept having a the main character, a 16-year old girl named Samantha, initially be one of the antagonists. She's a mean girl. It was an fascinating look into the world of girl cliques and what turns a girl into a bully, and what lengths it takes to bring her back into civility.

What I didn't like:
I'll be honest. I didn't like how it ended, but I understand it's the author's prerogative to end the story any way she feels. I thought it was unnecessary, but I won't go into any further detail, lest I ruin the story for other readers. It irritated me that there were moments when the main character was strong and assertive, but would fall back into her old passive and weak ways so easily. This was her struggle though, and the main theme of the book. I don't feel like there was any real justice. The main character arch ends with Samantha a better person, but the rest of her clique doesn't receive punishment. There isn't even have an epilogue that sheds light on how the supporting characters have changed or improved.

What I did like:
The main character seemed more realistic to me than many other formulaic young adult novels, she is realistically flawed. I could believe that Samantha was too self centric to see her world in any other way than as a spoiled, superficial, petty, popular brat. But as the story progresses her redeeming qualities are revealed. Her ability to overcome peer pressure and to realize what really mattered to her in her life, (her family) and making amends. 

Verdict:
I'd recommend this book, particularly to teen girls who are living through the hell that is high school. I think that despite the ending, the content is valuable and would be a great tool in a classroom setting to bring up the topic of bullying. The story is aggravating but engrossing. Reading it, you simply must know if Samantha will change and grow up.

Thursday, May 3, 2012

Mod Podge Tile Coasters


Found these fun little DIY coasters that are super easy to make and cheap too!

Like all projects lately, I found this one on Pinterest. I'm thinking Christmas presents... but they're not likely to be a surprise anymore since I put them on here. Oh well, I think they are cool so here's my attempt.

Pinspiration: Tile Coasters

You will need:
  • 4 - 5 square tiles (4.25" x 4.25"), white ones are cheapest. I think I payed 13 cents a piece! 
  • 4 - 5 pieces of fabric or scrapbook or wrapping paper (3.75" x 3.75")
  • 4 - 5 pieces of felt or foam (3.75" x 3.75")
  • Mod Podge
  • Sponge brush
  • Glue, For gluing the fabric or foam to the bottom of your coasters
  • Clear acrylic sealer spray paint

Optional:
  • Cutting board
  • Rotary cutter for fabric

How to:

1.  Cut your fabric or scrapbook paper into 3.75" x 3.75" squares.

2.  Mod Podge the top of you first tile and center your patterned square. Make sure tho get all the air bubbles out from underneath the square, you're gonna put cups full of liquid on them and you want the surface to be flat. Let it dry.

3.  After you let it dry a little, put a layer of Mod Podge on top. Let this dry.

4.  Put a few layers of Mod Podge on the top of the coaster. Do this for all of your coasters.

5.  Once you've properly coated your coaster you'll want to protect it and make it water proof. Spray the acrylic sealer on your coasters. You'll want to give them a few coats of the sealer as well.

6.  While everything is drying, cut your foam or felt into 3.75" x 3.75" squares.

7.  Glue your felt or foam squares to the bottom of the coasters.

8.  Let your coasters dry and cure for a couple of days before you put anything hot on them, but after that you should be able to use them for anything.


You should be able wipe the coasters clean, but they are not likely dishwasher safe.  The best part about this is you can make these for pretty cheap. I had the Mod Podge and the fabric already. The sealer paint wasn't much, maybe $4 but you will be able to use it on other projects. Sponge brushes are from the dollar store. You can find felt and foam both at the dollar store.

These turned out cute and I suggest you go make some this weekend!


Saturday, April 14, 2012

Photo Letter Blocks


I saw these photo message blocks over at the Stories by Me! blog on Pinterest, and thought what a wonderful surprise they would be for my Best Buddy who lives out of state. The poor girl ends up with all my craft attempts. This one, however, turned out pretty slick, even if my photos don't do them any justice. (Maybe she'll take a photo of them for me in their natural setting and share it.)


Pinspiration: Letter Blocks

What I used: 
  • 3 to 6 blocks depending on your word(s). I found blocks measuring about 1.5 inches, but these are a little small.
  • 3 - 4 coordinating scrapbook papers to match your theme
  • ModPodge Matte Decoupage Glue - (Or make your own)
  • Laser Printer - Inkjet colors will smear if they get wet! Most home printers are Inkjet.
  • Scissors
  • Foam Brush
  • Sandpaper/Sanding Block
  • 9 to 18 photos formatted to fit your blocks. 
  • Photo editing software, such as Adobe® PhotoShop® (Gimp a downloadable program or Pixlr, an online photo editing program would work as well)
Optional:
  • Finishing Spray
  • Distress Ink or Chalk
  • Letter Stencils
  • Acrylic Paint

How To:
  1. GET ORGANIZED. Figure out what you want to spell. I wanted to have two words on opposite sides of the blocks. I chose F-A-M-I-L-Y and F-R-I-E-N-D. Then I picked out some bright and summery colored paper that I knew my friend would like. Then I sorted through a bunch of photos to narrow down which ones I thought were worthy.

  2. I used PhotoShop to re-size my images to what I needed and printed mine in black and white on the laser printer. You could use real photos though, printed from a photo lab.

  3. I printed my letters out onto scrapbook paper that I had to trim to 8.5"x11" in order to run through the printer. Another option could be to paint or stencil your letters on to the paper. You could also cut your letters out and glue just the letters on your blocks like this example from Berlin Patch.

  4. Trim all your images and letters to fit whatever size of blocks you have.

  5. Paint a coat of ModPodge on the cut ends of your blocks, as they will soak up and absorb more of the glue than the other sides. Let this dry before continuing.

  6. Paint a thin layer of glue to the first side of one block. Place your first photo or letter square over glue and press in to place, removing any air bubbles or crookedness. While the glue is drying, continue to repeat the process for your other blocks and squares of paper. Try your best to WAIT for the glue to dry before trimming or sanding any excess paper.

  7. Once the glue is dry, sand the EDGES of each block and avoiding scratching the photos or letters. Optional: If you want an aged or distressed look, rub ink or chalk along the sides of the sanded portions of the blocks. The idea is to darken the exposed wood and disguise any white paper edges. (I chose not to do a distressed look.)

  8. To protect the photos, spray a few layers of finishing Acrylic paint or a few more coats of ModPodge.

Saturday, April 7, 2012

Peppermint Meltaways


These cookies are a HIT among the women I know. Men like them, but not NEARLY as much for some reason. DISCLAIMER: If you read the ingredients of these marvelous cookies, you'll see that they are mostly butter and flour. So don't be surprised when a serving size is probably only two cookies. These are almost pure fat... with that said, who freaking cares?! They are awesome!

One more thing before you start. These cookies WILL NOT TURN OUT IF YOU DON'T USE REAL BUTTER. Duh. Some of you might think this is a no brainer, but in my early experiences with this recipe, I discovered this the hard way. If you are able to get them to taste the same using margarine, let me know what portions you used.

Prep Time: 45 min.
Chill Time: 30-60 minutes
Bake Time: 12 minutes
Makes 3.5 - 4 dozen cookies

Nutrition per serving (ONE cookie):
Calories: 83
Fat: 5g
Cholesterol: 10mg
Carbs: 10g
Fiber: 0g
Protein: 0g
Sugar: 6g
Sodium: 45mg


Cookie Ingredients:
1 cup butter, softened
1/2 cup powdered sugar
1/2 teaspoon peppermint extract
1 1/4 cups all-purpose flour
1/2 cup Cornstarch

Glaze Ingredients:
1 1/2 cups powdered sugar
2 tablespoons butter, softened
1 to 2 tablespoons milk
1/4 teaspoon peppermint extract
2 to 3 drops red food color, if desired
Candy canes or hard peppermint candy, crushed

Preparation:

1. Combine: Butter, powdered sugar and the peppermint extract in large bowl. (If you use a metal bowl it will cool the dough much quicker.) Beat together at medium speed to cream the butter with the sugar, scraping bowl frequently. Reduce mixer speed to low; add your flour and cornstarch. Beat until mixed together well. Cover and refrigerate until dough is firm (30 to 60 minutes).

2. Heat: oven to 350°F.

3. Shape: Rounded teaspoonfuls of dough into 1-inch balls. (This is smaller than you think. I usually end up going back and pinching a little off of the cookies to make them smaller.) Place 1-1.5 inches apart onto ungreased cookie sheet. (plenty of butter in these so they shouldn't stick.) Also, I flatten mine with the heel of my hand a little so they don't puff as much... I guess this is a personal preference. but the icing stays on better I think.

4. Bake for 12 to 15 minutes or until edges are lightly browned (the rest of the cookie will still look very light. Let stand 1 minute then remove from cookie sheet to cool completely.

5. LET THEM COOL. (Sometimes it's hard for me to wait, but icing these buggers will be much easier if they are cooler.)

6. Drizzle: glaze over cooled cookies. To make the glaze, combine 1 1/2 cups powdered sugar, 2 tablespoons butter, 1/4 teaspoon peppermint extract and enough milk for desired glazing consistency in small bowl OR like I did, in a baggy, and mix by squishing the bag. If you mix it in a baggy, you can just cut the corner and drizzle using the bag like a piping bag and have one less bowl to clean! Add in food color, if desired. Immediately sprinkle with crushed candy.


Recipe Variation: Try using Almond extract instead of Peppermint, or maybe Lemon or Orange. This cookies is a good base for trying different flavored extracts.

ShareThis